W-2 Filing Web Service
Notes for year-end 2023 --- requires Keystone 4.5 or higher!
Keystone supports a web-based process for electronic filing of year-end tax forms. No more stuffing envelopes, no more printing! Electronically file W-2 and W-3 forms to the IRS/SSA and/or state in minutes!
W-2 Filing via Web Services should be completed as part of the Payroll: Year End process.
How it Works
After finalizing year end payroll data, select the new options on the Web Portal Export/Filing menu. These options automatically upload data to the Web Portal. From there you can setup an account and finish processing options online.
When filing W-2 and/or ACA forms you can choose either or both of 2 options:
- E-File
- Print and Mail Services
E-File allows you to preview and adjust data before filing.
With the Print and Mail services your W-2 and/or ACA forms are printed and mailed directly to employees. You also have the option to email each employee with an option to preview their forms online.
Since this is a premium service there is a modest per-employee fee. Please see the chart below for pricing.
Forms 940, 941 and 944 are not available at this time.
Learn more... https://givenhansco.nelcoportal.com/Content/Filing_Information
W-2 Walkthrough
Before filing W-2s, please make sure you have verified that your year-end payroll data is correct. Also be sure that you have completed the W-2 Setup instructions. Below is a sample of the W-2 Web Filing process.
Exporting W-2s from Keystone
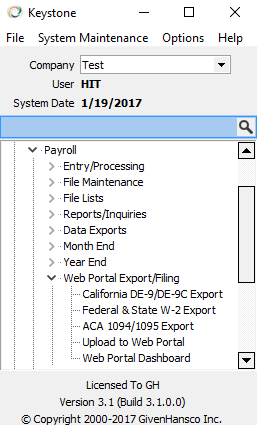
As of Keystone 3.1, a new "Web Portal Export/Filing" menu has been added to the Payroll section:
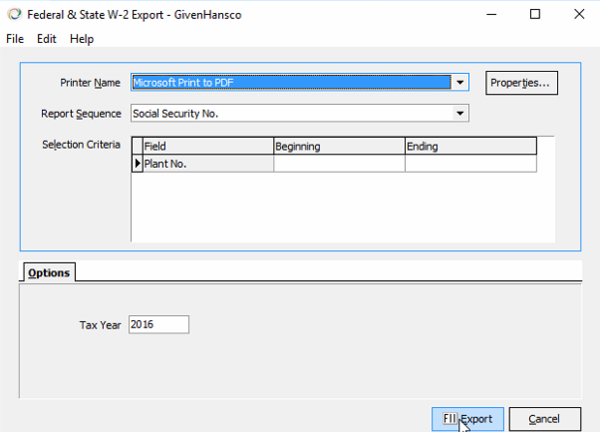
Select the "Federal & State W-2 Export" option and the following screen will appear:
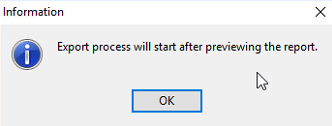
Verify the Tax Year and click the Export button. You will see this message:
Click the OK button and a summary of employees that will be exported appears:
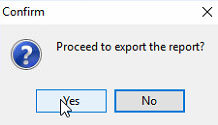
Once you have verified the totals, close the preview and you will see this message:
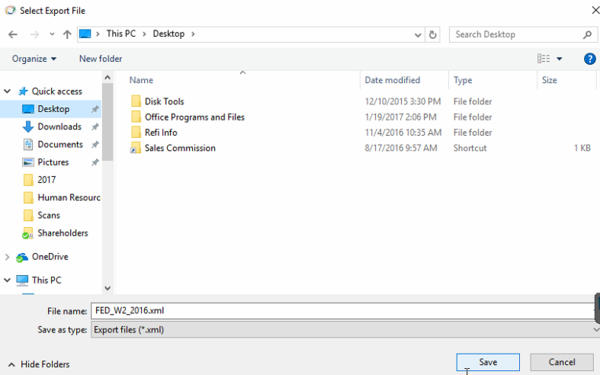
Click Yes to proceed. You will be asked to specify where you would like to save the export file:
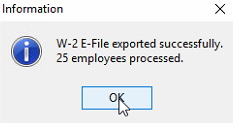
Select a suitable location to save the export file and click the Save button. You will then see a final message similar to the following:
Setting up your Web Portal Account
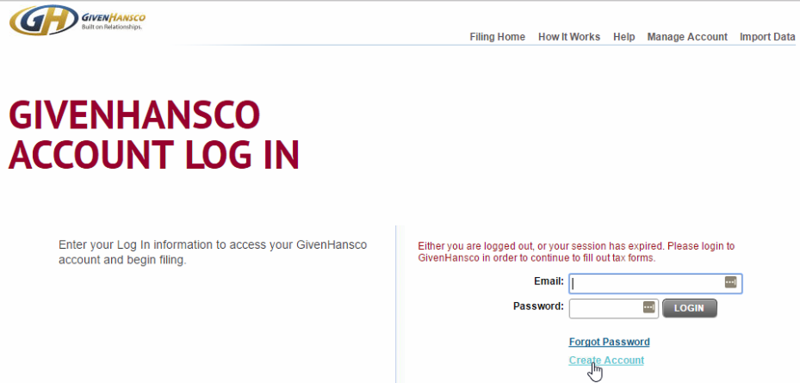
Before using the Web Portal to file for the first time, you must setup an account. Select the "Upload to Web Portal" option and your web browser will open to the following page:
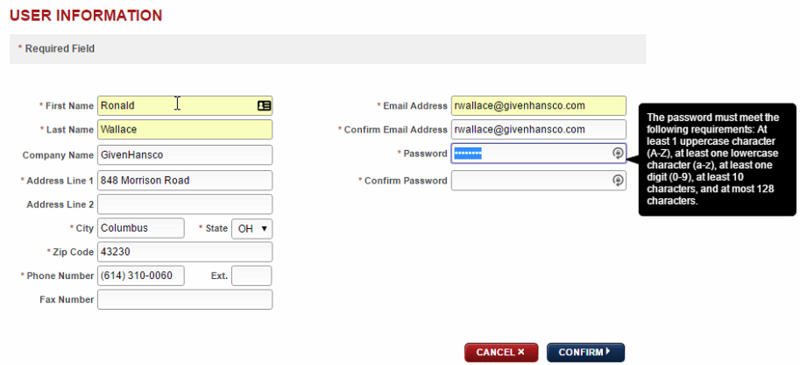
Click "Create Account" and you will be asked to enter your account information on the next page:
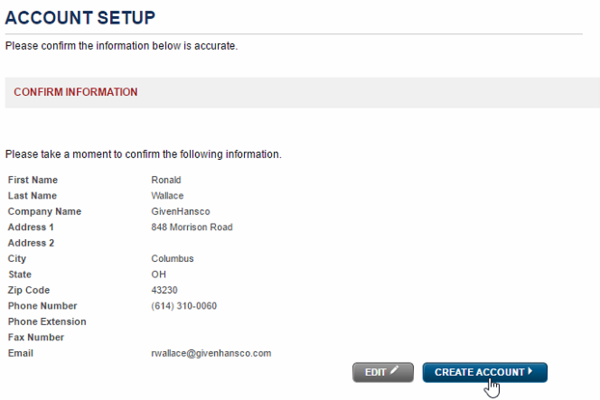
When choosing a password for your account, pay special attention to the indicated password requirements. After entering all your information, click "Confirm" which will take you to a confirmation page:
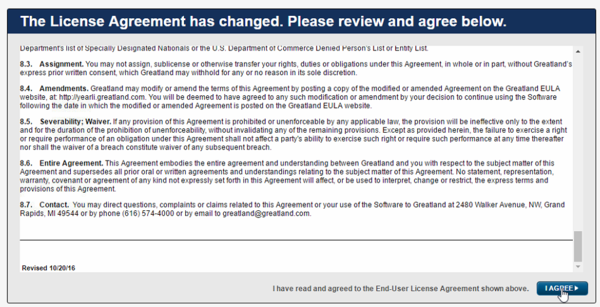
Review all information and make any necessary corrections using the "Edit" button. When all the information is accurate, click the "Create Account" button. You will now be asked to review the License Agreement:
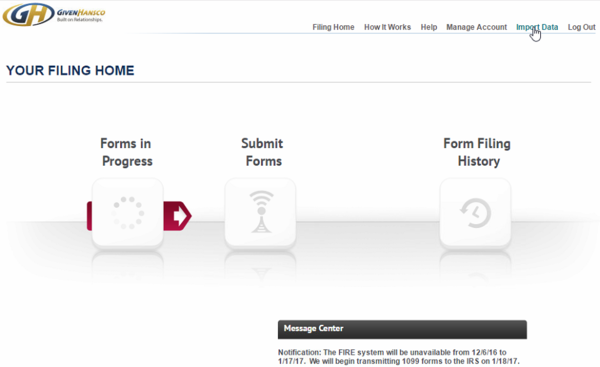
Carefully read the License Agreement. Click "I Agree" to accept the terms. You will now see the Filing Home page:
Click "Import Data" in the upper-right corner. This will open the Data Import page.
Uploading data to the Web Portal
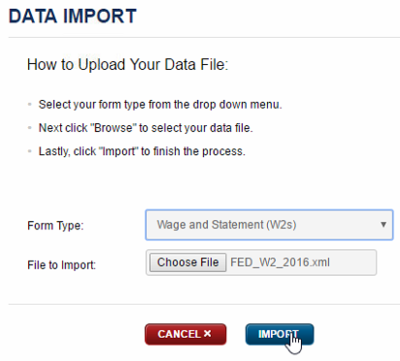
The Data Import page will now appear:
Be sure to select "Wage and Statement (W2s)" as the Form Type. Then click the "Choose File" button and locate your W-2 Export file from the previous step. Once you have selected your export file, click the "Import" button. It is possible that you may see one or more error messages such as the following:
In this case, the State Id Number for two employees has been entered incorrectly. You can switch back to Keystone, make the necessary corrections and re-export the file. Then switch back to the Web Portal and click the "Return to Import" button where you can re-upload the file. Upon successfully uploading an error-free file, you will see this page:
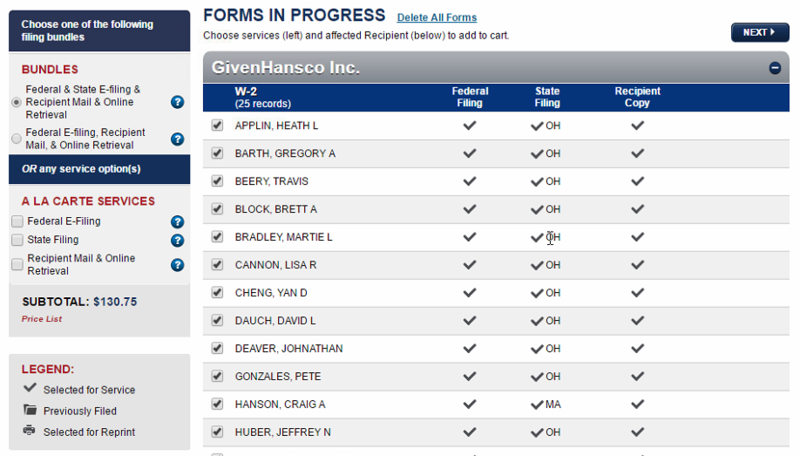
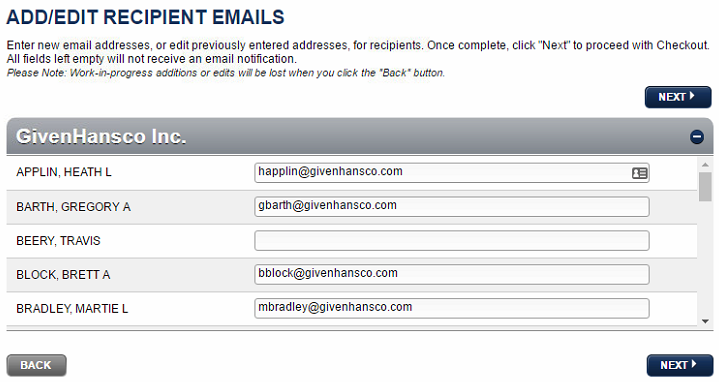
This page lists all the employees that have been imported and indicates which state's W-2 they are filing. On the left side of the page you can pick which services you would like the Web Portal to perform for you. The Subtotal will be updated as different options are selected. Once you have made your selection, click the "Next" button in the upper-right corner to proceed. You may see the following page if some of your employees have missing email addresses in Keystone:
Fill in the empty email addresses. If an employee does not have an email address you can leave it blank, but that employee will not be able to retrieve his W-2 using the Web Portal. When all corrections have been made, click "Next" to proceed to the Submit Forms page:
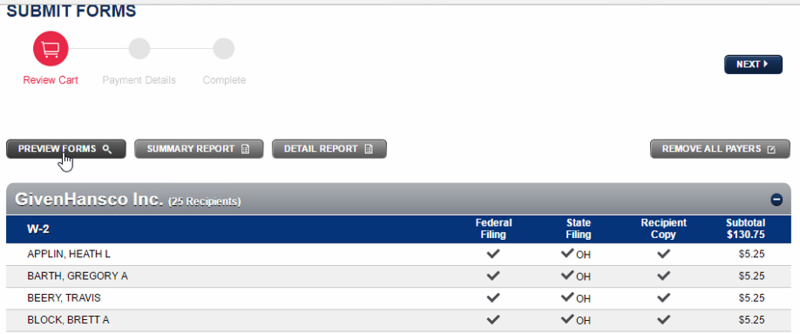
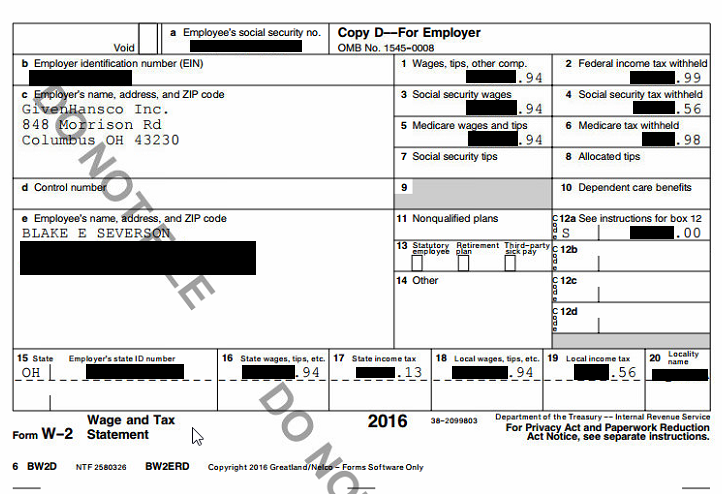
This page gives you a summary of employees, which forms will be filed and the cost for each employee. You may click the "Preview Forms" button to see a preview version of all the W-2s. This will download a PDF file to your computer that you can then open:
After reviewing the preview of the W-2 forms, click the "Next" button in the upper-right corner. Now you will be taken to the "Submit Forms" page:
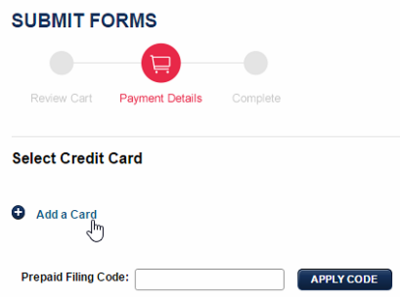
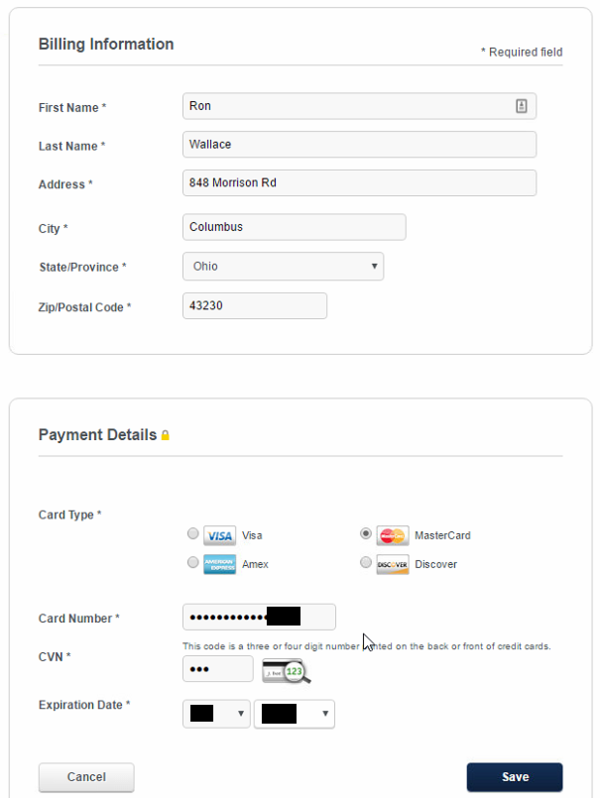
The first thing you will have to do is enter a form of payment. Click "Add a Card" to proceed to the secure page and enter your Billing Information and Payment Details:
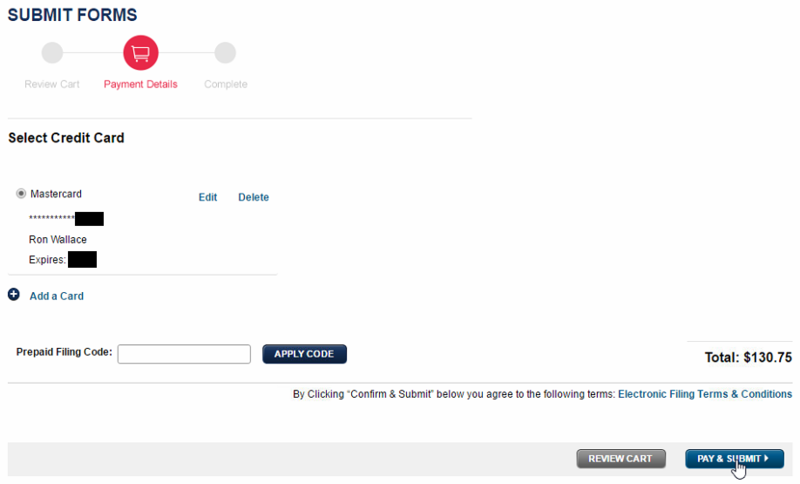
Click the "Save" button when all information has been entered. This will return you to the "Submit Forms" page where you will see your Total amount:
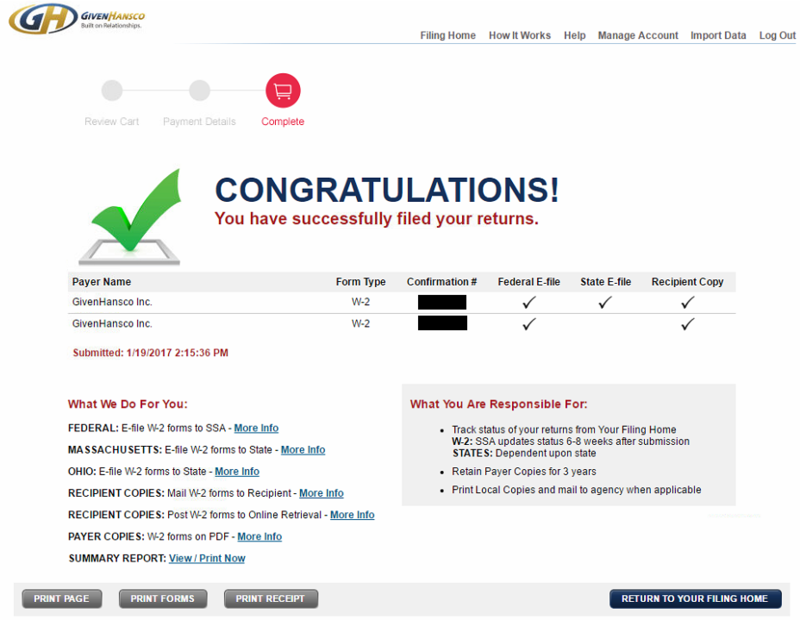
Click the "Pay & Submit" button to proceed. After a short delay, you will see the Congratulations page:
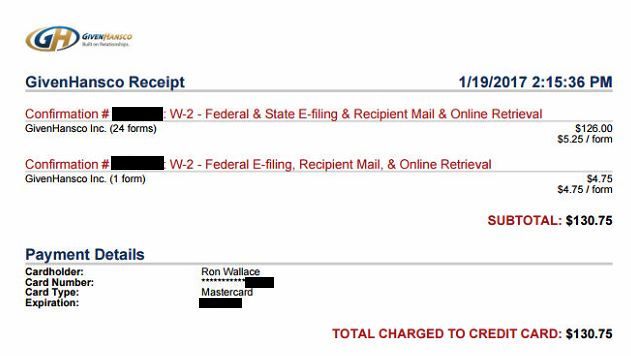
Click the "Print Receipt" button to view/print your receipt:
You may now close your web browser window.
Employee Email
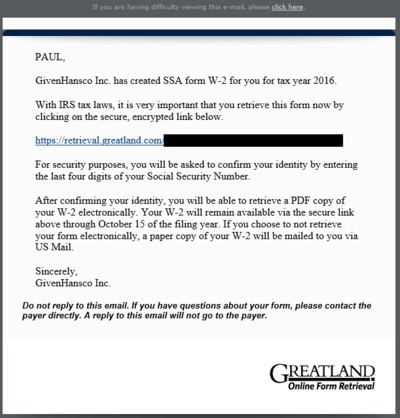
If you selected the option for "Online Retrieval" when filing W-2 forms, your employees will receive an email allowing them to retrieve a copy of their W-2 online. This email will be sent from "<Your Company Name> <emailreplies@greatland.com>". Here is a sample email:
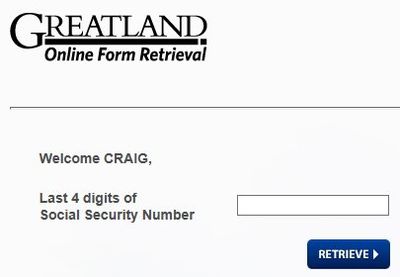
When the employee clicks the link in the email, their web browser will open to this page:
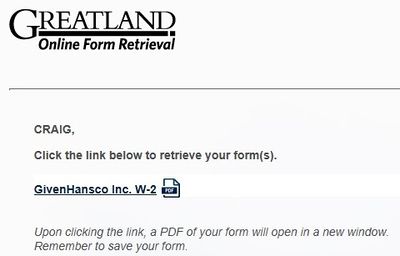
After entering the last 4 digits of their social security number, this page will appear:
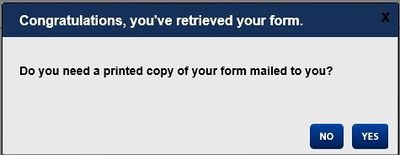
Clicking the link will download a PDF version of the employee's W-2 to their computer. They will also see this message:
The employee can elect whether or not to receive a printed copy of their W-2 in the mail. Once they have made their choice they can close their web browser.
Remember it is your responsibility to verify taxes are accurately and completely filed and forms are received by employees!
W-2C (Corrections)
This process requires Microsoft Excel and Keystone to be installed on the PC that you will use to enter W-2C corrections.
Preparing Excel Spreadsheet
- In Windows, copy the file "Form W2C Template.xlt" located in the "C:\Program Files (x86)\GivenHansco\Keystone\Forms" folder to your Documents folder.
- Open the file just copied to your Documents folder in Excel.
Entering W-2C Corrections using Excel
- For each W-2 form to be corrected:
- Fill in the Emp Id, Soc Sec # Previous, First Name Previous, Middle Initial Previous and Last Name Previous columns.
- For the remaining columns, fill in the Previous and Corrected columns ONLY for data that needs to be corrected.
- After all employee corrections have been entered:
- Delete the first three rows of the spreadsheet.
- Select the File-Save As option in Excel.
- Under "Other Locations" select "This PC".
- In the "Enter file name here" box, enter a descriptive name for the corrections (ex: "Form W2C 2023").
- In the dropdown box directly underneath the file name box, select "CSV UTF-8 (Comma delimited) (*.csv)".
- Click the "Save" button.
Exporting W-2C Corrections
- Start Keystone.
- Run the option "Federal W-2C (Corrections) Export" located on the Payroll-Web Portal Export/Filing menu.
- Verify that the "Correction Tax Year" is correct.
- Select "Corrected" for the Correction Reason.
- Click the Export button.
- You will be asked to "Select W-2C File".
- Select the file in your Documents folder that you saved your corrections into.
- Shortly you will see a preview of the corrections entered.
- Close the preview window.
- You will now be asked "Proceed to export the report?".
- Click Yes.
- You will be asked to "Select Export File".
- Be certain your Documents folder appears at the top, then click Save.
- When complete you will see an information box with the number of employees processed.
- Click OK.
Uploading W-2C Corrections to Web Portal
- Run the option "Upload to Web Portal" located on the Payroll-Web Portal Export/Filing menu.
- Login to the web portal using your previous login information.
- See "Uploading Data to the Web Portal" above.
